If your KitchenAid washing machine is stuck on rinse, you’ve come to the right place. In this easy-to-follow guide, we’ll be listing the causes of this issue, and giving you steps on how to fix them…
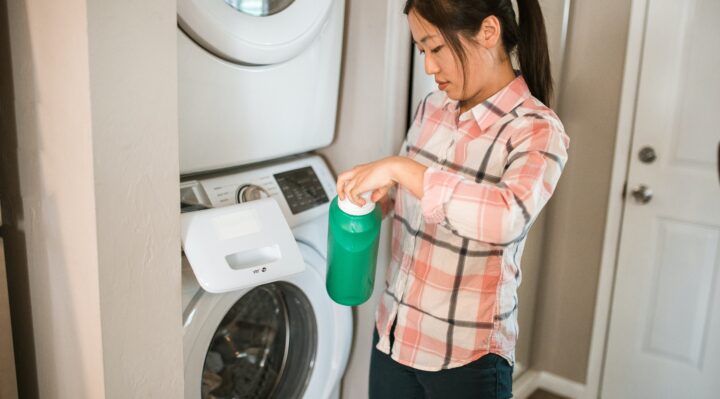
Table of Contents
KitchenAid Washing Machine Is Stuck On Rinse — How To Fix
If your KitchenAid washing machine is stuck on rinse, the following are issues to look for…
1. KitchenAid Washing Machine Is Stuck On Rinse — Water Taps Are Off
If your KitchenAid washing machine is stuck on rinse, it could be as a result of not turning the water taps on. Ensure that you fully open the water supply faucets before starting a wash cycle.
2. KitchenAid Washing Machine Is Stuck On Rinse — Burnt Control Board
If your KitchenAid washing machine is stuck on rinse, it could be as a result of a burnt control board. Follow the steps below to replace this part…
Front Loaders
Take the following steps to replace a damaged control board in your KitchenAid washing machine…
Step 1. Ensure that your machine is disconnected from the power outlet before starting this repair, in order to prevent electrocution.
Step 2. Using either a 1/4 inch nut-driver or a Torx-20 screwdriver, take out the nuts at the back of the cabinet holding the top panel. Slide the panel backwards about an inch or so, then lift it off the machine.
Step 3. Pry the cap off the control board mounted on the cabinet. Disconnect the wire harnesses attached to the control board (ensure that you note where each plug goes).
Step 4. Release the wires from the retainers on the control board. Take out the bolts securing the control board to the cabinet.
Step 5. Pry the old board off the cabinet, then discard it. Prepare your new washing machine control board for installation by unpacking it.
Step 6. Mount the new board on the cabinet, then apply the bolts to secure it. Plug each wire harness into its appropriate terminal on the new control board.
Step 7. Secure the wires in the retainers on the control board. Snap the cover onto the new board.
Step 8. Mount the top panel on the cabinet, then push it forwards. Secure the panel by applying the bolts at the back.
Step 9. Plug your washing machine’s power cord into the outlet, then try running a wash cycle to ensure that the problem has been fixed.
Top Loaders
Replace a damaged control board in your top loader KitchenAid washing machine by following the steps below…
Step 1. Disconnect your machine from the power outlet before starting this repair, in order to prevent electrocution.
Step 2. Insert a tool such as a putty knife underneath the two front corners of the control panel (this will release the locking clips).
Step 3. Lift the control panel, then set it face-down on the washer’s lid. Pull the pressure tube off the port on the control board.
Step 4. Note the positioning of the wires attached to the control board, then disconnect each one. Release the wires from the retainers on the board.
Step 5. Loosen the bolts holding the control board to the control panel using your nut-driver. Lift the board off the panel, then discard it.
Step 6. Prepare your new washing machine control board for installation by unpacking it. Mount the new board on the control panel, then tighten the bolts.
Step 7. Plug each wire harness into its appropriate terminal on the control board. Secure the wires in the retainer.
Step 8. Attach the pressure tube to the port on the new board. Lift the control panel assembly, then snap it into the cabinet.
Step 9. Plug your washing machine’s power cord back into the outlet. Ensure that the problem has been fixed by running a rinse cycle.
Note: Please keep in mind that some of the steps above will vary depending on your washer’s model.
3. KitchenAid Washing Machine Is Stuck On Rinse — Damaged Water Pressure Switch
The water pressure switch monitors the water level and tells the valve assembly when to turn off. If this switch fails, your washing machine may overfill, or not fill at all. If your KitchenAid washing machine is stuck on rinse, you’ll need to replace this part. Follow the steps below to do this…
Front Loaders
Take the following steps to replace a damaged water pressure switch in your front loader KitchenAid washing machine…
Step 1. Disconnect your appliance from the power outlet before starting this repair, in order to prevent electrocution.
Step 2. Using a 1/4 inch nut-driver, loosen the screws at the back of the machine securing the top panel. Pull the panel backwards a few inches, then lift it off the machine.
Step 3. Detach the wire harness from the pressure switch mounted on the cabinet. Pry the pressure switch off the cabinet.
Step 4. Detach the tube connected to the switch, then discard the switch. Prepare the new water level sensor for installation by unpacking it.
Step 5. Connect the pressure tube to the new pressure switch. Snap the switch onto the cabinet, then reconnect the wire harness.
Step 6. Mount the top panel on the cabinet, then slide it forwards. Secure the top panel by tightening the bolts at the back.
Step 7. Plug your washing machine’s power cord into the outlet, then try running a wash cycle to ensure that everything works properly.
Top Loaders
The following steps show you how to replace a damaged pressure switch in your top loader KitchenAid washing machine…
Step 1. Prevent any chances of electrocution by disconnecting your appliance from the outlet.
Step 2. Using some string if needed, pry off the water level knob on the control panel. Insert a tool such as a putty knife underneath the front corners of the control panel (this releases the locking clips).
Step 3. Lift the control panel off the mount, then set it face-down on the cabinet. Disconnect the wire harness attached to the water level sensor.
Step 4. Using a pair of pliers if needed, release the retaining clamp holding the pressure tube to the sensor. Detach the tube from the sensor.
Step 5. Use a flat-blade screwdriver to pry the pressure sensor off the control panel. Discard the old sensor, then prepare the new one for installation by unpacking it.
Step 6. Snap the new sensor onto the control panel. Plug the wire harness into the new sensor.
Step 7. Attach the pressure tube to the port on the new sensor, then slide the retaining clamp into place.
Step 8. Lift the control panel, then snap it into the cabinet. Push the water level knob back onto the control panel.
Step 9. Reconnect your washing machine’s power cord to the outlet. Ensure that the problem has been fixed by running a wash cycle.
Check out these other articles…
KitchenAid Washing Machine Door [6 Issues & Proven Solutions]
KitchenAid Washing Machine Filter [3 Issues & Quick Solutions]
Asko Washing Machine Is Leaking [6 Problems & Proven Solutions]
Asko Washing Machine Will Not Spin [4 Problems & Proven Solutions]
Asko Washing Machine Is Making Noise [4 Problems & Quick Solutions]
Zanussi Washing Machine Bearings [Issues & Proven Solutions]
Zanussi Washing Machine Is Not Draining [2 Problems & Quick Solutions]
4. KitchenAid Washing Machine Is Stuck On Rinse — Failed Water Inlet Valve
If your KitchenAid washing machine is stuck on rinse, the final thing to check is the water inlet valve. This valve controls the flow of water into the machine. Follow the steps below to test this part…
Front Loaders
Take the following steps to test the water inlet valve inlet valve in your front loader KitchenAid washing machine…
Step 1. Disconnect your appliance from the power outlet and turn the water taps off before starting this procedure in order to avoid leakage and electrocution.
Step 2. Using a pair of pliers if needed, disconnect the COLD and HOT water supply hoses from the ports at the back of the machine (some water may spill, so keep a rag nearby).
Step 3. Take out the bolts holding the top panel to the cabinet using a 1/4 inch nut-driver. Pull the panel backwards a few inches, then lift it off the cabinet.
Step 4. Use pliers to squeeze the retaining clamps holding the outlet hoses to the inlet valve, then slide them out of place. Detach the hoses from the valve.
Step 5. Note the positioning of the wires attached to the inlet valve, then disconnect each one. Use your nut-driver to take out the bolts securing the valve assembly to the cabinet.
Step 6. Pull the inlet valve out of the cabinet. Get a digital multimeter, then turn the control knob to the lowest setting for ohms of resistance.
Step 7. Push each probe of the multimeter into each of the inlet valve terminals. For a working connection, you should get a reading between 600 and 1600 ohms. If the readings are much lower or higher than these, you’ll need to replace the valve.
Step 8. If the valve is in good condition, remount it on the cabinet, then apply the bolts to secure it.
Step 9. Attach the outlet tubes to the inlet valve, then slide the retaining clamps into place. Plug each wire harness back into the valve.
Step 10. Place the top panel on the cabinet, then push it forwards. Secure the panel by applying the bolts at the back.
Step 11. Reconnect the COLD and HOT water supply hoses to the corresponding ports at the back of the machine (ensure that each hose is properly attached in order to prevent leakage).
Step 12. Turn the water taps back on, then plug the power cord back into the outlet. Ensure that the issue has been fixed by running a wash cycle.
Top Loaders
Test the valve assembly in your top loader KitchenAid washing machine by following the steps below…
Step 1. Disconnect your machine from the power outlet before starting this repair in order to prevent electrocution.
Step 2. Turn the water supply taps off to prevent leakage. Using a pair of pliers if needed, disconnect the COLD and HOT water supply hoses from the back of the machine.
Step 3. Insert a tool such as a putty knife underneath the front corners of the control panel (this releases the locking clips).
Step 4. Lift the control panel off the machine, then disconnect the wire harness from the control board. Set the panel aside.
Step 5. Note the positioning of the wires attached to the valve assembly, then disconnect them.
Step 6. Use a 1/4 inch nut-driver to take out the bolts securing the valve assembly to the cabinet. Pull the valve assembly out of the machine.
Step 7. Get a digital multimeter, then turn the dial to the lowest setting for ohms of resistance.
Step 8. Push the probes of the meter into each of the terminals on the valve assembly. For a working connection, look for a reading between 600 and 1500 ohms.
Step 9. If the reading is much lower or higher than these numbers, the valve is damaged and needs to be replaced.
Step 10. Once you are sure that the valve assembly is in good condition, reinstall it in the cabinet, then apply the bolts.
Step 11. Plug each wire harness into its appropriate terminal on the valve. Plug the control panel wire harness back into the control board.
Step 12. Snap the control panel onto the cabinet. Reconnect the HOT and COLD water supply hoses to the ports at the back of the machine.
Step 13. Plug your washing machine back into the power outlet, then turn the water faucets on. Ensure that the problem has been fixed by running a wash cycle.