If your Whirlpool washing machine says different things on the display, you’ve come to the right place; in this in-depth guide we’ll explain the causes of this messages and show you how to fix them…
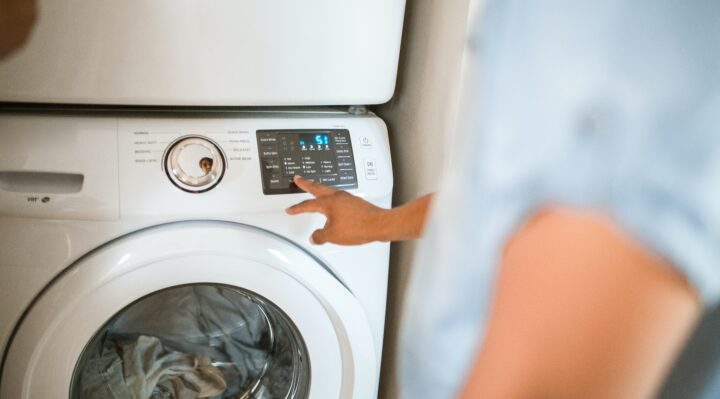
Table of Contents
Whirlpool Washing Machine Says Detergent Low — Solution
If your Whirlpool washing machine says “detergent low” it indicates that the appliance isn’t dispensing soap. Here are the causes of this issue…
1. Damaged Dispenser Assembly
The dispenser assembly housing the soap tray. If this dispenser is damaged, your machine may not dispense soap properly. Here are the steps on how to replace this part…
Front Loaders
Replace the dispenser assembly in your Whirlpool front loader washing machine with the following steps…
Step 1. Make sure to disconnect your washing machine’s power cord from the outlet before starting this procedure in order to prevent electrocution.
Step 2. Go to the back of the appliance, then use a 1/4 inch socket wrench to take out the three screws holding the top panel.
Step 3. Pull the top cover backwards a few inches, then lift it off the machine. Slide the detergent tray out of the housing, then press the button to release it from the dispenser.
Step 4. Using a Torx screwdriver, take out the two screws beside the dispenser opening. Use a 1/4 inch nut-driver to remove the bolt at the top of the control panel securing the dispenser.
Step 5. Slide the dispenser backwards to release it from the brackets. With a pair of pliers, release the spring clamp holding the dispenser hose to the bottom of the dispenser.
Step 6. Disconnect the outlet hose from the dispenser assembly. Move the dispenser assembly out of place, then use your pliers to release the two spring clamps holding the inlet hoses to the dispenser. Detach the hoses from the dispenser.
Step 7. Take the dispenser out of the cabinet, then discard it. Take your new washing machine dispenser assembly out of its packaging.
Step 8. Connect the water inlet hoses to the appropriate ports on the new dispenser assembly, then slide the spring clamps into place.
Step 9. Install the new dispenser in the cabinet, then attach the outlet hose to the port at the bottom. Move the retaining clamp into place to secure the connection.
Step 10. With a 1/4 inch nut-driver, apply the screw at the top of the control panel to secure the dispenser.
Step 11. Use your Torx screwdriver to apply the two screws next to the dispenser opening on the control panel.
Step 12. Slide the soap tray into the new dispenser. Place the top panel on the washer, then tighten the three bolts at the back using your 1/4 inch nut-driver.
Step 13. Reconnect your appliance to the electrical outlet, the try running a cycle to ensure that the issue has been fixed.
Top Loaders
Follow the steps below to replace the dispenser in your Whirlpool top loader washing machine…
Step 1. For more working space, have someone help you move the appliance forwards a bit. Disconnect the power cord from the outlet in order to prevent electrocution.
Step 2. Open the lid of your washer. Pry the dispenser bezel off the top of the machine, then set it aside.
Step 3. Go to the back of the appliance, then take out the three bolts holding the control panel to the back of the washer using a 1/4 inch nut-driver.
Step 4. Insert a tool such as a putty knife underneath the front corners of the control panel (this should release the retaining clips).
Step 5. Lift the control panel, then disconnect the wire harness from the control board. Set the panel aside.
Step 6. Unplug the faucet switch wire connector. Push the faucet switch connector through the opening on the top panel.
Step 7. Go to the back of the machine, then use your nut-driver to take out the nut holding the wiring and tube guard to the rear panel.
Step 8. With the 1/4 inch nut-driver, take out the screws at the back of the appliance securing the top panel.
Step 9. Pull the top panel forwards a bit, then lift and support it. Using a flat-blade screwdriver if needed, release the dispenser and faucet switch tabs from the top panel.
Step 10. With needle-nosed pliers, release the spring clamp holding the dispenser tube to the top panel. Disconnect the tube from the panel.
Step 11. Discard the old dispenser and faucet switch assembly, then take the new one out of its packaging.
Step 12. Transfer the spring clamp from the old dispenser assembly to the hose on the new one.
Step 13. Lift the top panel, then connect the hose to the port. Secure the connection by sliding the spring clamp into place.
Step 14. Push the new wire connector through the opening at the bottom of the top panel. Snap the new dispenser into the opening on the top panel.
Step 15. Lower the top panel assembly and snap it back into the cabinet. Apply the two bolts at the back to secure the panel.
Step 16. Put the wiring and tube guard back in position, then use your nut-driver to apply the nut. Plug the faucet switch wire connector back in.
Step 17. Snap the bezel onto the new dispenser. Plug the control panel’s wire connector back into the main control board.
Step 18. Snap the control panel onto the machine, then secure it by applying the two screws on the rear panel.
Step 19. Move your washing machine back into place, then plug the power cord into the outlet. Ensure that everything works properly by running a cycle.
2. Damaged Dispenser Hose
If your Whirlpool washing machine isn’t dispensing, the second most common cause is a damaged dispenser hose. The steps below show you how to replace this part…
Front Loaders
To change a damaged dispenser hose in your Whirlpool front loader washing machine, follow the steps below…
Step 1. Disconnect your washing machine from the outlet before starting this repair in order to prevent electrocution.
Step 2. Move your washing machine forwards a bit to get more working space (if needed, get someone to assist you).
Step 3. Using your 1/4 inch nut-driver, loosen the three bolts at the back of the machine securing the top panel. Pull the panel backwards a few inches, then lift it off the machine.
Step 4. Go to the front of the machine, then pull the soap tray out of the dispenser. Press the button inside the tray to completely release it from the housing.
Step 5. Using a Torx-20 screwdriver, loosen the bolts next to the dispenser opening. With a flat-blade screwdriver, pry the control panel tabs off the cabinet.
Step 6. Lift the control panel off the front of the machine, then set it on top of the cabinet.
Step 7. Use a 1/4 inch nut-driver to loosen the three bolts at the bottom of the lower front access panel. Pry the panel off the washer and set it aside.
Step 8. Open the door of your machine, then take out the two screws holding the door lock assembly to the front panel using a Torx-20 screwdriver.
Step 9. Insert a flat-blade screwdriver underneath the metal wire around the door boot seal. Work the screwdriver around until the entire wire comes off (take care not to puncture the door gasket).
Step 10. Peel the door boot seal off the front panel. Using your 1/4 inch nut-driver, loosen the four screws at the corners of the main front panel.
Step 11. Lift the front panel assembly, then pull it off the cabinet. Using a pair of pliers, release the spring clamp holding the dispenser hose to the tub, then slide it out of place.
Step 12. Detach the hose from the tub. Release the clamp at the other end of the hose, then disconnect the hose from the dispenser assembly.
Step 13. Take your new dispenser hose out of its packaging, then transfer the spring clamps from the old hose to the new one.
Step 14. Connect one end of the new dispenser hose to the port on the dispenser assembly, then slide the spring clamp into place to secure it.
Step 15. Attach the other end of the dispenser hose to the tub assembly, then secure it using the spring clamp.
Step 16. Lift the front panel and mount it on the cabinet. Using your 1/4 inch nut-driver, apply the bolts at the top and bottom of the panel.
Step 17. Snap the lower access panel onto the front of the machine, then apply the three screws at the bottom using your nut-driver.
Step 18. Open the door of the machine, then push the door lock assembly back into place. With your Torx screwdriver, apply the door lock bolts.
Step 19. Fit the door boot seal back around the front panel. Using your flat-blade screwdriver, fit the retaining band around the gasket (do not puncture the gasket).
Step 20. Lift the control panel, then snap it back onto the front of the machine. Using your Torx-20 screwdriver, apply the two screws next to the dispenser opening.
Step 21. Slide the soap tray back into the dispenser assembly. Remount the top cover on the cabinet, then tighten the three bolts at the back using your 1/4 inch socket wrench.
Step 22. Move your washing machine back into place. Plug the power cord into the electrical outlet, then try running a wash cycle to see if the issue has been fixed.
Top Loaders
The steps below show you how to replace the dispenser hose in your Whirlpool top loader washing machine…
Long Dispenser Hose
Follow the steps below to replace the long dispenser hose in your Whirlpool top loader washing machine…
Step 1. Ensure that your washing machine is disconnected from the electrical outlet before starting this repair, in order to prevent any chances of electrocution.
Step 2. With someone assisting you, carefully move the washing machine forwards a bit to get more working space.
Step 3. Go to the back of the washer, then use a 1/4 inch socket to loosen the nut holding the tube and wiring guard. Take the plate off the machine and set it aside.
Step 4. Using the socket wrench, take out the two screws at the back holding the top panel to the cabinet.
Step 5. Pull the top panel forwards, then lift and support it using a lanyard, or by laying it against a wall.
Step 6. Pull the long dispenser hose off the detergent metering control port at the bottom of the top panel.
Step 7. Using a pair of needle-nosed pliers, release the clamp holding the other end of the hose to the dispenser assembly. Take the retaining clamp off the old hose.
Step 8. Discard the old dispenser hose, then prepare the new one for installation by taking it out of its packaging. Transfer the clamp from the old hose to the new one.
Step 9. Connect the appropriate end of the new hose to the port on the dispenser assembly, then use the spring clamp to secure it.
Step 10. Attach the other end of the dispenser hose to the port on the detergent metering control.
Step 11. Carefully lower the top panel assembly and snap it back into the cabinet. Apply the bolts at the back of the machine to secure the top panel.
Step 12. Put the wiring and tube guard back in place, then apply the nuts to secure it. Move your washer back into place, then reconnect the power cord to the outlet. Test the machine by running a wash cycle.
Short Dispenser Hose
To replace the short dispenser hose in your Whirlpool top loader washing machine, follow the steps below…
Step 1. To get more working space, have someone help you move the appliance forwards a few inches. Prevent electrical damage by disconnecting the washing machine from the outlet.
Step 2. With a 1/4 inch nut-driver, take out the bolt securing the tube and wiring guard to the back of the machine. Take the plate off the cabinet and set it aside.
Step 3. Using the nut-driver, loosen the screws holding the top panel assembly to the cabinet. Lift the top panel and support it.
Step 4. With a pair of pliers, take out the spring clamp holding the short hose to the dispenser. Detach the hose from the dispenser.
Step 5. Pull the other end of the hose off the port of the detergent metering control. Slide the spring clamp off the hose.
Step 6. Take your new washing machine dispenser hose out of its packaging, then slide the retaining clamp on.
Step 7. Connect the ends of the new dispenser hose to the port on the dispenser and detergent metering control. Secure the connection by sliding the retaining clamp into place.
Step 8. Lower the top panel, then snap it back onto the cabinet. Use your 1/4 inch nut-driver to apply the bolts at the back of the machine.
Step 9. Put the wiring and tube guard back on the cabinet, then tighten the bolt with your socket wrench.
Step 10. Plug your washing machine’s power cord back into the power outlet, then try running a cycle to see if the issue has been fixed.
Check out these other articles…
How To Move A Washing Machine [Detailed Guide]
Whirlpool Washing Machine Error Codes [How To Fix]
Whirlpool Washing Machine Not Spinning [How To Fix]
Whirlpool Washing Machine Spinning [Problems & Solutions]
How To Clean Whirlpool Washing Machine [Detailed Guide]
Whirlpool Washing Machine Draining [How To, Issues & Solutions]
Whirlpool Washing Machine Agitator [How To, Issues & Solutions]
Whirlpool Washing Machine Says LO FL — Quick Fix
If your Whirlpool washing machine says LO FL on the display, it indicates that the machine isn’t detecting any water. Here are the most common causes of this issue…
1. Water Tap Is Off
If your Whirlpool washing machine isn’t filling, the first thing you should do is check to ensure that the water faucets are turned on. Also ensure that the inlet hoses aren’t bent or kinked.
2. Dirty Water Inlet Filters
Over time, dirt from your water supply can accumulate in your washer’s inlet ports. To fix this issue, you’ll need to loosen the water supply hoses, then pull out the mesh filters.
Take the mesh filters to a sink and clean them thoroughly. Afterwards, push them back into the ports and reconnect the inlet hoses. Try running a wash cycle to ensure that the problem has been fixed.
3. Damaged Water Inlet Valves
The water inlet valves control the quantity of water that flows into the machine. If the valve fails, the washer will not fill at all. To test the inlet valves in your Whirlpool washing machine, follow the steps below…
Front Loaders
To test the inlet valve assembly in your Whirlpool front loader washing machine, follow the steps below…
Step 1. Ensure that the power cord is unplugged and the water faucets are turned off before starting this procedure.
Step 2. Disconnect the HOT and COLD water supply hoses from the ports at the back of your machine (some water may spill out, so ensure that you keep a rag nearby).
Step 3. Use 1/4 inch socket wrench to take out the bolts holding the top panel to the cabinet. Slide the top backwards, then lift it off the machine.
Step 4. With a Torx screwdriver, take out the bolts holding the inlet valve assembly to the cabinet.
Step 5. Pull the inlet valve out of place, then disconnect the wire connectors (make sure to take note of where each one goes).
Step 6. Using your pliers, release the retaining clamps holding the two inlet tubes to the valve assembly. Disconnect the tubes from the water inlet valves.
Step 7. Insert the probes of a multimeter into the terminals on the inlet valve and look for a continuous electrical path. If the tests come back negative for any terminal, it indicates that the valve is damaged.
Step 8. If the results come out correctly, you don’t need to replace the valve. Reconnect the inlet tubes to the ports on the valve, then slide the spring clamps into place.
Step 9. Mount the water inlet valve in the cabinet, then use your Torx screwdriver to apply the nuts.
Step 10. Plug each electrical connector into its appropriate terminal on the valve assembly. Place the top cover on the cabinet, then tighten the three screws at the back to secure it.
Step 11. Reconnect the two inlet hoses to the ports at the back of the washer. Plug the machine into the outlet, then turn the water faucets back on. To see if the machine works properly, try running a spin cycle.
Top Loaders
Follow the steps below to learn how to test the inlet valve in your Whirlpool top loader washing machine…
Step 1. Move the washer forwards a bit to get access to the back. Turn the water taps off, then disconnect the power cord from the outlet.
Step 2. Spread a towel underneath the inlet hoses in order to catch any leaks. Disconnect the inlet hoses from the back of your machine.
Step 3. Using a 1/4 inch nut-driver, loosen the screws on the rear panel securing the control panel.
Step 4. Wedge a putty knife into the two front corners of the control panel (this releases the retaining clips).
Step 5. Lift the control panel, then unplug the wire connector from the main control board.
Step 6. Disconnect the wire harnesses attached to the inlet valve terminals (ensure that you not where each one goes).
Step 7. Use a 1/4 inch nut-driver to take out the screws holding the inlet valve to the top of the cabinet.
Step 8. Insert multimeter probes into the terminals of the inlet valve and look for a continuous electrical current. If you don’t find a current, it indicates that the terminal is damaged.
Step 9. If you do find a current, the valve is in good condition. Reinstall the water inlet valve in the machine, then apply the bolts to secure it.
Step 10. Plug the wire connectors into the terminals on the valve. Plug the control panel wire connector into the main control board.
Step 11. Snap the control panel onto the cabinet, then apply the screws at the back to secure.
Step 12. Reattach the water supply hoses to the inlet ports, then turn the water faucets on. Plug the power cord into the electrical outlet, then ensure everything works properly by testing the machine.
Dryer Machine
Test the water inlet valve in your Whirlpool dryer with the following steps…
Step 1. In order to prevent water leaks and electrocution, ensure that your dryer is disconnected from the outlet, and the water faucet is turned off before starting this repair.
Step 2. Disconnect the inlet valve from the port at the back of the machine (if needed, use a pair of pliers).
Step 3. Using a nut-driver, loosen the bolt holding the venting to the back of the machine. Use a 1/4 inch socket to remove the two bolts at the back of the machine holding the top panel.
Step 4. Lift the top panel off the cabinet, then set it aside. Using the nut-driver, take out all the bolts holding the rear panel to the cabinet.
Step 5. Loosen the bolts at the top of the rear panel and on the control board bracket. Carefully lift the rear panel off the cabinet, then set it aside.
Step 6. Unplug the wire connector from the terminal on the water inlet valve. Using a 1/4 inch nut-driver, take out the two bolts holding the inlet valve mounting bracket to the cabinet.
Step 7. With a flat-blade screwdriver, release the locking ring holding the inlet tube to the valve assembly. Disconnect the tube from the water inlet valve.
Step 8. Insert the probes of a multimeter into the terminals of the inlet valve. Look for a continuous electrical path in the terminals. If the test comes back negative, the valve is damaged.
Step 9. If the results come back positive, the valve is in good condition. Reconnect the inlet tube to the port on the valve, then snap the retaining ring on.
Step 10. Remount the inlet valve assembly in the cabinet, then apply the bolts using your 1/4 inch socket wrench.
Step 11. Plug the wire connectors back into the valve’s terminals. Lift the rear panel, then remount it onto the cabinet. Apply all the screws to secure the rear panel.
Step 12. Use your nut-driver to apply the control board bracket bolt. Slide the top cover back onto the machine, then tighten the screws at the back.
Step 13. Reconnect the venting to the back of the appliance. Attach the water inlet hose to the port on the dryer.
Step 14. Turn the water tap back on, then plug the power cord back into the electrical outlet.
Washer/Dryer Combo
Follow the steps below to inspect the water inlet valve in your Whirlpool washer/dryer combo machine…
Step 1. With the help of another person, move the washing machine forwards a bit to gain access to the back.
Step 2. Disconnect your washing machine from its power outlet, then turn the water taps off before starting this repair.
Step 3. Using a pair of pliers, loosen the water supply hoses attached to the inlet ports (make sure to keep a rag nearby in case water spills out).
Step 4. Go to the front of the appliance, then use a Philips screwdriver to take out the four bolts securing the dryer compartment’s lower access panel. Lift the panel off the machine and set it aside.
Step 5. Pull the two access panel clips out of the slots on the top panel. Take out the four bolts securing the access panels using a 1/4 inch socket wrench.
Step 6. With a flat-blade screwdriver, pry out the two retaining clips securing the top panel to the cabinet.
Step 7. Slide the top panel forwards, then lift it off the machine. Reach behind the tub and use a 5/16 inch socket wrench to loosen the bolts holding the inlet valve assembly to the cabinet.
Step 8. Pull the valve out of the cabinet, then unplug the wire connectors attached to it (make sure to take note of where each connector goes).
Step 9. With a pair of pliers, release the spring clamp holding the inlet tube to the valve assembly. Disconnect the water inlet tube from the valve assembly.
Step 10. Insert the probes of a multimeter into each of the terminals on the valve. Look for a continuous electrical path. If the terminal tests negative, it means the valve is defective.
Step 11. If the terminal tests positive for continuity, you don’t need to replace it. Reconnect the inlet tube to the valve assembly, then move the retaining clamp into place.
Step 12. Reconnect each wire harness to its appropriate terminal on the inlet valve. Remount the water valve on the cabinet, then apply the mounting bolts using your 5/16 inch socket wrench.
Step 13. Mount the top panel on the cabinet and push it back into place. Using a flat-blade screwdriver, push the spring clips back into the slots on the top panel.
Step 14. Put the two access panel clips back in place, then apply the four bolts using your 1/4 inch nut-driver. Slide the access panel clips back into the slots.
Step 15. Mount the dryer compartment’s access panel, then use your Philips screwdriver to apply the bolts.
Step 16. Go to the back of the machine and reconnect the water hoses to the ports. Turn the taps back on, then plug the power cord into the electrical outlet. Ensure that everything works properly by running a wash cycle.
4. Faulty Water Pressure Switch
The water pressure switch monitors the water in the drum and tells the inlet valve when to turn off. If the switch fails, the machine may overfill or not fill at all.
For detailed steps on how to fix filling issues in your Whirlpool washing machine, read this article: Whirlpool Washing Machine Error Codes. This guide also gives you steps on how to fix other different problems in your washing machine.