“How to wash after tie dye?” is a question that often plagues DIY enthusiasts. You’ve invested time and creativity into your tie-dye project, and the last thing you want is to see those vibrant colors fade away. This guide offers a comprehensive, step-by-step approach to washing your tie-dye creations so that they remain as stunning as the day you made them.
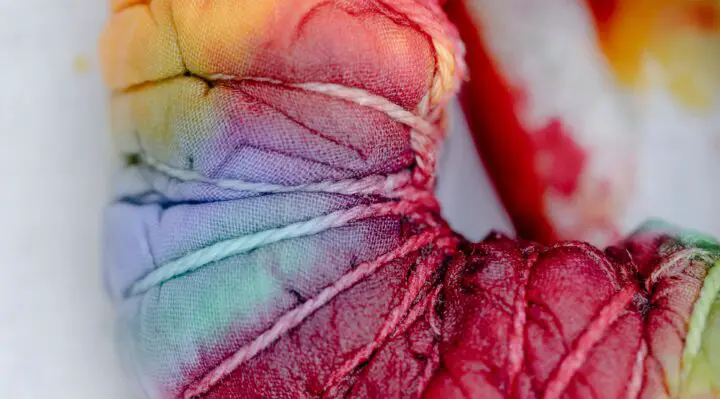
Table of Contents
Things You’ll Need
Cold water
White vinegar (optional)
Step 1: Wait for the Dye to Set
Why It’s Important: Giving the dye ample time to set is crucial for the colors to bond with the fabric fibers. If you rush this step, you risk the dye washing out, leaving you with a muted or uneven design.
What To Do: After you’ve completed your tie-dyeing process, let the fabric sit as per the instructions on your dye package. Most suggest a minimum of 6 to 8 hours, but some may recommend up to 24 hours for optimal color setting.
Tips:
Keep the fabric wrapped in plastic wrap or placed in a sealed plastic bag to maintain moisture, as this helps the dye to set. Place the item in a warm, dry area to facilitate the setting process.
Step 2: Remove Any Bands or Ties
Why It’s Important: Rubber bands, strings, or ties were instrumental in creating your intricate patterns. However, leaving them on can lead to uneven color setting and may make it difficult to wash out any excess dye properly.
What To Do: Carefully cut or unroll the rubber bands or strings from the fabric. Make sure to be gentle to avoid tugging the fabric, which can disturb your design.
Tips:
Use a pair of small scissors for precision if you’re having trouble removing tightly-wound bands or strings. Discard the bands and ties; reusing them may transfer old dye onto new projects.
Step 3: Rinse Off Excess Dye
Why It’s Important: Rinsing removes any loose or excess dye that has not bonded with the fabric, ensuring that it won’t bleed into other areas of your design or other fabrics in future washes.
What To Do: Wear rubber gloves to prevent your hands from getting stained. Hold your tie-dyed item under cold running water, gradually increasing the water pressure. Keep rinsing until the water runs clear.
Tips:
Begin rinsing with a gentle flow of water to avoid dislodging the dye too forcefully. If you have multiple tie-dyed items, rinse them separately to prevent color bleeding.
Step 4: Pre-Wash Soak (Optional)
Why It’s Important: A pre-wash soak can further lock in the dye, making your colors more vibrant and long-lasting.
What To Do: Fill a sink or basin with cold water and add a cup of white vinegar. Fully submerge your tie-dyed item in this mixture and let it soak for about 30 minutes.
Tips:
Stir the item gently a couple of times during the soak to ensure even vinegar distribution. If you don’t have white vinegar, you can also use a commercial dye fixative following the instructions on the package.
Step 5: Wash with Mild Detergent
Why It’s Important: A gentle hand-wash removes any lingering dye particles and preps your tie-dyed piece for regular laundering. This step also helps to rinse out any vinegar or other soaking agents you might have used.
What To Do: Fill a sink or basin with cold water and add a small amount (about a teaspoon) of mild, dye-free, and fragrance-free detergent. Submerge your tie-dye item fully and swish it around in the soapy water.
Tips:
Use your hands to gently press and release the fabric to help the soap penetrate the fibers without disturbing the dye. If your item is of a delicate material like silk or rayon, consider using a detergent specifically designed for delicate fabrics.
Step 6: Rinse and Repeat
Why It’s Important: Rinsing removes any soap residue that can affect the fabric’s feel and appearance. It also gives you a chance to ensure that all excess dye has been removed.
What To Do: Drain the soapy water from the sink or basin and refill it with cold water. Immerse your item and swish it around until the water runs clear. If the water becomes colored, it means there’s still some dye left.
Tips:
If you notice dye still seeping out, return to Step 5 and wash the item again before re-rinsing. If you’re rinsing in a sink, make sure to clean the sink immediately after to prevent any dye transfer onto the sink surface.
Step 7: Air Dry
Why It’s Important: Air drying is the safest way to dry your newly tie-dyed item. High heat from a tumble dryer can fade the colors and compromise the vibrancy you worked so hard to achieve.
What To Do: Hang your item in an area with good airflow but out of direct sunlight, as UV rays can also fade the colors. Make sure the item is fully dry before folding or wearing.
Tips:
Use padded or plastic hangers for heavy items like sweatshirts to maintain their shape while drying. If you need to speed up the drying process, you can use a clean, absorbent towel to gently press out excess water before hanging the item to dry.
For more articles on how to wash, click here: How to Wash: Your Comprehensive Guide to Clothing and Fashion Care
Conclusion: How to Wash After Tie Dye
Taking proper care of your tie-dye creations doesn’t have to be a daunting task. By following these comprehensive steps—from waiting for the dye to set to finally air drying your piece—you can ensure that your artwork will remain as vibrant and captivating as the day you made it.
Each step serves a crucial purpose, be it locking in the color, ensuring evenness, or maintaining the fabric’s quality. While it might seem like a meticulous process, the attention to detail pays off in the long run.
Your tie-dye items will not only look better but also last longer, allowing you to enjoy your creative endeavors for years to come.
