If your AEG washing machine won’t turn on, you’ve come to the right place. This quick guide provides steps on how to deal with this issue…
AEG Washing Machine Won’t Turn On — How To Fix
The following are issues to look for if your AEG washing machine won’t turn on…
1. AEG Washing Machine Won’t Turn On — Tripped Circuit Breaker
If your AEG washing machine won’t turn on, the first thing to do is ensure that the circuit breaker hasn’t tripped. If the breaker tripped, you’ll need to reset it.
2. AEG Washing Machine Won’t Turn On — Faulty Power Outlet
The second thing to check if your AEG washing machine won’t turn on is the power outlet. Unplug your washer from the outlet and try plugging another appliance in. If the second appliance also won’t turn on, it indicates that the outlet is faulty. To fix this issue, you’ll need to contact an electrician.
3. AEG Washing Machine Won’t Turn On — Damaged Power Cord
If your AEG washing machine won’t turn on at all, unplug the power cord from the outlet and check it for damage. If you notice any damage to the cord, follow the steps below to replace it…
Front Loaders
To replace a damaged power cord in your AEG front loader washing machine, follow the steps below…
Step 1. Unplug the power cord from the electrical outlet in order to prevent electrocution.
Step 2. Go to the back of the appliance, then take out the Philips screws holding the top panel. Pull the cover backwards a few inches, then lift it off the machine.
Step 3. Take out the screw securing the grounding wire on the support rail at the top of the rear panel.
Step 4. Pry the control board cover open (use a flat-blade screwdriver if needed). Unplug the power cord connector from the control board.
Step 5. With a pair of pliers, release the power cord strain relief from the back of the cabinet. Pull the power cord out of the cabinet.
Step 6. Use a pair of pliers to slide the strain relief off the power cord. Discard the old cord, then prepare the new one for installation by unpacking it.
Step 7. Transfer the strain relief to the new power cord. Pass the new power cord through the opening at the back of the cabinet.
Step 8. Plug the power cord’s wire connector into the main control board. Snap the cover onto the control board.
Step 9. Apply the nut to secure the power cord grounding wire to the support rail. Mount the top panel on the cabinet, then slide it back into place. Tighten the Philips screws at the back to secure the top panel.
Step 10. Plug the new power cord into the electrical outlet. Ensure that the issue has been fixed by turning the machine on.
Dryers
The steps below show you how to replace a damaged power cord in your AEG dryer…
Step 1. In order to avoid any chances of electrocution, unplug the power cord from the outlet before starting this repair.
Step 2. Go to the back of the machine, then use a Philips screwdriver to take out the nuts holding the terminal block access plate to the cabinet. Lift the plate off.
Step 3. Use your screwdriver to loosen the nuts holding the three power cord wires to the terminal block. Pull the wires off the terminals (ensure that you note where each wire goes).
Step 4. Loosen the screws holding the power cord strain relief to the back of the cabinet. Pull the power cord off the machine.
Step 5. Prepare your new dryer power cord for installation by unpacking it. Transfer the strain relief from the old power cord to the new one.
Step 6. Pass the new power cord through the opening at the back of the cabinet. Position the strain relief on the cabinet, then secure the two halves by tightening the screws.
Step 7. Connect each power cord wire to it’s corresponding point on the terminal block. Secure the wires by tightening the Philips screws.
Step 8. Snap the terminal block access plate back on, then apply the screws secure it. Plug your appliance into the electrical outlet, then try turning the dryer on to see if the issue has been fixed.
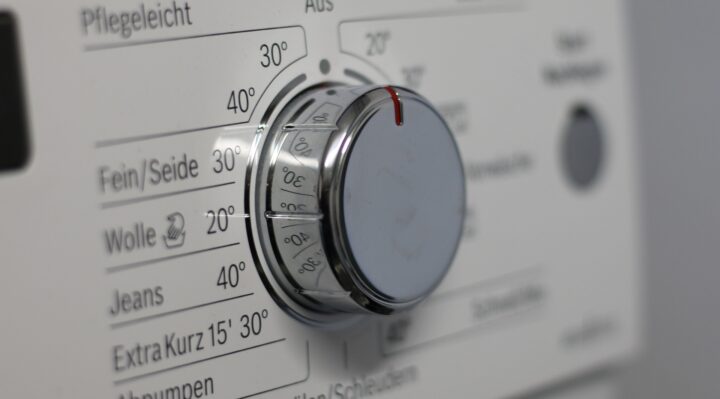
4. AEG Washing Machine Won’t Turn On — Damaged Interface Control Board
If your AEG washing machine won’t turn on, the next cause to look for is a damaged interface control board. The steps below show you how to replace this part..
Front Loaders
Follow the steps below to replace a damaged or burnt interface control board in your front loader AEG washing machine…
Step 1. Avoid any chances of electrocution by unplugging your washer from the power outlet before starting this repair.
Step 2. Go to the back of the cabinet, then remove the screws holding the top cover using a Philips screwdriver. Slide the top cover backwards a few inches, then lift it off.
Step 3. Open your washing machine’s door. Using needle-nosed pliers or a flat-blade screwdriver, carefully pry out the retaining band securing the door seal to the lip of the front panel.
Step 4. Peel the door gasket off the front panel. Tilt the washing machine backwards a bit, then place something underneath to support it (get someone to assist you).
Step 5. With a Philips screwdriver, remove the nuts at the bottom of the front panel. Lower the appliance onto the floor.
Step 6. Slide the detergent tray out, then press the little button inside to release it from the dispenser housing.
Step 7. Loosen the two screws on the control panel next to the dispenser opening. Take out the nuts at the top of the control panel.
Step 8. Lift the entire front panel off the cabinet carefully, then unplug the door switch and user interface connectors at the back.
Step 9. Set the front panel face-down on the floor. Using a small flat-blade screwdriver, pry the little ribbon connector from the user interface board off the control knob board.
Step 10. With your Philips screwdriver, loosen the screws holding the interface control board to the front panel. Pull the board off and discard it.
Step 11. Prepare your new interface board for installation by removing it from its packaging. Mount the new board on the front panel, then tighten the Philips screws to secure it.
Step 12. Plug the ribbon connector into the control knob board. With the new board in place, lift the front panel carefully.
Step 13. Plug the user interface and door switch connectors into the front panel. Mount the front panel on the cabinet, then apply the Philips screws at the top.
Step 14. Tighten the screws next to the dispenser’s opening on the control panel. Push the soap tray into the housing.
Step 15. Open the door of your appliance, then carefully fit the door seal around the lip of the front panel.
Step 16. Use your flat-blade screwdriver to fit the retaining band around the door seal. Tilt the appliance backwards and support it.
Step 17. Apply the Philips screws at the bottom of the front panel. Lower your appliance onto the floor.
Step 18. Mount the top cover on the cabinet, then slide it into place. Use your screwdriver to tighten the nuts at the back.
Step 19. Connect the power cord to the electrical outlet, then try turning the appliance on to see if the problem has been fixed.
Note: Depending on the model of your washer, all you need to do is loosen the screws holding the control panel in order to access the interface board.
Dryers
Follow the steps below to replace a damaged interface control board in your AEG dryer…
Step 1. Disconnect your washing machine from the electrical outlet before starting this repair in order to prevent electrocution.
Step 2. Go to the back of your appliance, then remove the Philips screws holding the top cover to the cabinet. Slide the panel backwards a bit, then lift it off.
Step 3. Use your screwdriver to take out the nuts at the top of the control panel. Using a flat-blade screwdriver if needed, pry the control panel off the front of the machine.
Step 4. Unplug the user interface connector from the control panel. Place the control panel face-down on the floor.
Step 5. Remove the screws holding the user interface board to the control panel. Pull the board off the panel.
Step 6. Pry the control knob and buttons off the interface control board. Prepare the new board for installation by taking it out of its packaging.
Step 7. Transfer the buttons and control knob from the old board to the new one. Mount the new interface control board on the control panel, then secure it by tightening the Philips screws.
Step 8. Plug the interface wire connector into the new control board. Snap the control panel onto the front of the cabinet, then use your Philips screwdriver to apply the nuts at the top.
Step 9. Mount the top cover on the appliance, then slide it into place. Apply the screws at the back of the cabinet to secure the top panel.
Step 10. Plug your machine into the electrical outlet. Try turning the machine on to ensure that the issue has been fixed.
5. AEG Washing Machine Won’t Turn On — Damaged Terminal Block (Dryers)
If your AEG washing machine won’t turn on, the final thing to do is replace the terminal block. Follow the steps below to do this…
Step 1. Avoid any chances of electrocution by disconnecting your machine from the outlet before starting this procedure.
Step 2. Go to the back of the machine, then use a Philips screwdriver to remove the screws holding the terminal block access plate. Lift the plate off and set it aside.
Step 3. Use your screwdriver to loosen the nuts holding the power cord wires to the terminal block.
Step 4. Pull each wire off the terminal block. With your screwdriver, take out the nut securing the terminal block to the back of the cabinet.
Step 5. Pull the terminal block out of the machine. Using a pair of wire cutters, cut the three power supply wires at the top of the terminal block (cut the wires as close to the block as you can).
Step 6. Prepare your new dryer terminal block for installation by unpacking it. Strip off about 1/4 inches of insulation from the power supply wires.
Step 7. Attach each of the power cord wires to the provided terminals (ensure that the white wire is connected to the silver terminal). Secure the wires by crimping the end of each terminal with needle-nosed pliers.
Step 8. Align each of the terminals in the new terminal block, then snap them into place. Mount the new terminal block on the rear bulkhead, then apply the Philips screw to secure it.
Step 9. Connect each of the power cord wires to the appropriate terminals on the terminal block. Secure the wires by applying the Philips screws.
Step 10. Mount the terminal block access plate on the machine, then apply the Philips screws to secure it.
Step 11. Plug your dryer back into the power outlet, then try turning it on to see if the issue has been fixed.