If you are having issues with your Maytag washing machine motor, you’ve come to the right place. In this guide, we’ll give you steps on how to deal with these issues…
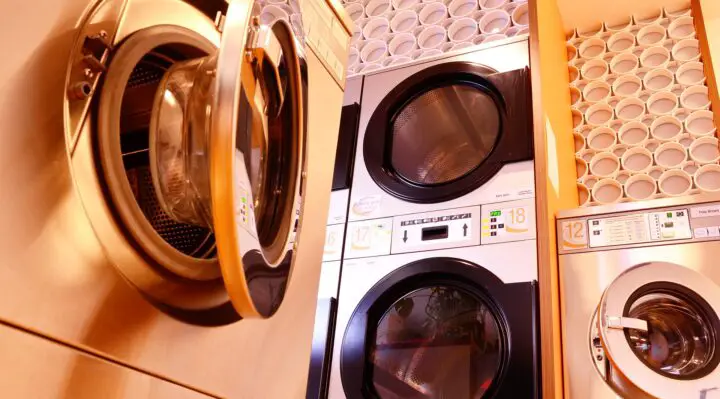
Table of Contents
Maytag Washing Machine Motor Not Working — Solved
If your Maytag washing machine motor isn’t working it will need to be replaced. Follow the steps below to do this…
Drive Motor
To replace your Maytag washing machine drive motor, follow the steps below…
Front Loaders
The steps below show you how to replace your front loader Maytag washing machine motor…
Step 1. In order to prevent any chances of electrocution, it is advised that you disconnect your washing machine from the outlet before starting this repair.
Step 2. With a 1/4 inch nut-driver, loosen the bolts at the back of the machine securing the rear panel. Slide the panel upwards, then lift it off the machine.
Step 3. Carefully rotate the drive pulley, then take the drive belt off the two pulleys. Unplug the wire connectors attached to the motor assembly (ensure that you take note of where each connector goes).
Step 4. Using a 13mm socket wrench, loosen the bolts holding the motor assembly to the bottom of the tub. Carefully take the motor off the tub and set it aside.
Step 5. Prepare the new drive motor for installation by taking it out of its packaging. Mount the new motor at the bottom of the tub, then use your 13mm socket wrench to apply the bolts.
Step 6. Plug the wire connectors into their appropriate terminals on the new drive motor. With the grooved part turned inwards, loop the drive belt around the motor pulley and drive pulley.
Step 7. Mount the rear access panel on the cabinet, then tighten the bolts using your nut-driver. Plug your machine back into the outlet, then try running a cycle to ensure that everything works properly.
Top Loaders
To replace the drive motor in your top loader Maytag washing machine, follow the steps below…
Step 1. In order to prevent leaks and electrocution, it is advised that you turn the water taps off and disconnect your washing machine from the outlet before starting this repair.
Step 2. Spread a towel on the floor underneath the water supply hose to catch any leaks. Using a pair of pliers if needed, disconnect the water supply hoses from the ports on the machine.
Step 3. Using a pair of pliers, release the retaining clamp holding the drain hose to the port at the back of the cabinet. Detach the hose from the machine.
Step 4. Secure the lid of your washing machine by putting some tape on it. Get someone to help you tip your machine backwards carefully and set it on the floor.
Step 5. Take out the bolts holding the belt guard to the bottom of the machine using a 5/16 inch nut-driver. Take the belt guard off and set it aside.
Step 6. Carefully take the drive belt off the two pulleys and set it aside. Unplug the wire harness from the motor assembly.
Step 7. Using a 5/16 inch socket wrench, loosen the bolts holding the drive motor to the transmission plate. Lift the motor off the machine and set it aside.
Step 8. Prepare your new washing machine drive motor for installation by taking it out of its packaging.
Step 9. Mount the new drive motor on the transmission plate, then use your nut-driver to apply the bolts. Plug the wire connector into the new drive motor.
Step 10. Loop the drive belt around the motor pulley and transmission pulley (ensure that the grooved side of the belt is turned inwards).
Step 11. Put the belt guard back in place, then tighten the bolts using your 5/16 inch nut-driver.
Step 12. Carefully lift your washing machine upright and peel the tape off the lid. Reconnect the drain hose to the port at the back of the machine, then use pliers to slide the retaining clamp into place.
Step 13. Reattach the COLD and HOT water supply hoses to their corresponding ports at the back of the machine (in order to prevent leaks, ensure that the hoses are properly secured).
Step 14. Turn your washing machine’s water supply faucets back on, then reconnect the power cord to the electrical outlet. To ensure that everything works properly, try running a cycle.
Check out these other articles…
Whirlpool Washing Machine Smells [Proven Solutions]
Maytag Washing Machine Belt [Problems, Solutions & Guide]
Maytag Washing Machine Actuator [Problems, Solutions & Guide]
Maytag Washing Machine Error Codes [Proven Solutions]
Maytag Washing Machine Filter [Problems, Solutions & Guide]
Dryers
To replace a damaged motor in your Maytag dryer, follow the steps below…
Step 1. Make sure to disconnect your washing machine from the electrical outlet before starting this repair in order to prevent electrocution.
Step 2. Using a Torx screwdriver, take out the bolts at the bottom of the front panel. Lift the panel off the machine.
Step 3. Unplug the door switch wires from the front panel, then set the panel aside. Unhook the door switch wires from the retainers on the front bulkhead.
Step 4. Using a 1/4 inch nut-driver, take out the bolts holding the front bulkhead to the cabinet. Lift the bulkhead off the machine and set it aside.
Step 5. Carefully reach underneath the drum, then push the idler pulley inwards to release the tension on the drive belt. Take the drive belt off the two pulleys.
Step 6. Pull the drive belt and drum out of the cabinet, then set them aside. Using your nut-driver, take out the bolts holding the blower housing cover. Take the cover off and set it aside.
Step 7. Using a pair of needle-nosed pliers, take the spring clamp off the blower wheel. Pry the retaining ring off the blower wheel. Take the blower wheel off the shaft and set it aside.
Step 8. Using a small flat-blade screwdriver, pry the rear retaining ring off the motor shaft. Unplug each wire connector from the motor assembly (ensure that you take note of where each plug goes).
Step 9. With a nut-driver, take out the bolts holding the motor’s grounding wire to the cabinet.
Step 10. Pry the front and rear motor retaining clips off using a flat-blade screwdriver. Pull the motor assembly out of the cabinet, then discard it.
Step 11. Prepare your new washing machine drive motor for installation by taking it out of its packaging.
Step 12. Install the new motor in the cabinet, then snap the two retaining clips on. Plug each wire connector into its appropriate terminal on the new motor assembly.
Step 13. Place the rear snap ring onto the motor shaft in the blower assembly. Place the blower wheel on the shaft, then secure it using the snap ring. Use needle-nosed pliers to put the spring clamp on the shaft.
Step 14. Put the blower cover back on, then secure it by applying the bolts using your nut-driver.
Step 15. Carefully guide the drum and belt back into the cabinet. Reach underneath the drum, then push the idler pulley inwards. Loop the drive belt around the two pulleys in a zig-zag formation.
Step 16. Slowly rotate the drum by hand to ensure that the drive belt is properly aligned.
Step 17. Mount the front bulkhead on the cabinet, then secure it by applying the screws. Secure the door switch wires in the retainers on the front bulkhead.
Step 18. Plug each wire to the door switch on the front panel. Mount the front panel on the cabinet, then use your Torx screwdriver to apply the screws at the lower front.
Step 19. Plug your dryer back into the electrical outlet. To ensure that everything works properly, try running a cycle.
Stator
To replace a damaged stator in your Maytag washing machine, follow the steps below…
Front Loaders
Follow the steps below to replace the motor stator in your front loader Maytag washing machine…
Step 1. Disconnect your appliance from the outlet before starting this repair in order to prevent any chances of electrocution.
Step 2. Loosen the screws holding the rear access panel to the cabinet using a 1/4 inch socket wrench. Pull the rear panel upwards a bit, then lift it off the machine.
Step 3. Secure the rotor assembly using a strap wrench. Loosen the bolt holding the rotor to the tub using a 24mm socket wrench. Carefully pry the rotor assembly off the tub and set it aside.
Step 4. Using a 10mm socket wrench, take out the nuts holding the stator to the back of the tub. Take the stator off the tub, then unplug the wire connector.
Step 5. Discard the old stator, then prepare the new one for installation by taking it out of its packaging.
Step 6. Mount the new motor stator at the back of the tub, then tighten the bolts using your socket wrench. Plug the wire connector to the terminal on the new stator.
Step 7. Mount the rotor assembly on the stator, then apply the bolt using your 24mm socket wrench.
Step 8. Lift the rear access panel and mount it on the cabinet. Secure the rear panel by applying the nuts using the 1/4 inch socket.
Step 9. Plug your washing machine into the electrical outlet, then try running a cycle to ensure that everything works properly.
Top Loaders
To replace the motor stator in your top loader Maytag washing machine, follow the steps below…
Step 1. Secure the lid of your washing machine by putting some tape on it. Turn your washer’s water faucets off and disconnect the power cord from the outlet in order to prevent damage.
Step 2. Disconnect the water supply lines from the ports at the back of your machine. Using pliers, release the spring clamp holding the drain hose to the back of the cabinet. Pull the hose off the machine and set it aside.
Step 3. Carefully tip your washing machine backwards and set it on the floor (if needed, get someone to help you).
Step 4. Insert a small screwdriver into one of the holes on the rotor to help jam it. Loosen the bolt holding the rotor assembly to the tub using a 1/4 inch Allen wrench.
Step 5. Carefully pry the rotor off the machine and set it aside. Using a 3/8 inch socket wrench, loosen the bolts holding the stator to the bottom of the tub.
Step 6. Unplug the wire harness from the stator. Discard the old stator, then take the new one out of its packaging.
Step 7. Place the new stator and mounting plate at the bottom of the tub, then apply the bolt using your nut-driver. Plug the wire harness to the stator.
Step 8. Place the rotor assembly on the stator, then use the 1/4 inch Allen wrench to tighten the bolt.
Step 9. Carefully lift your washing machine onto its feet, then peel the tape off the lid. Reconnect the drain hose to the port at the back of the machine, then use pliers to slide the retaining clamp into place.
Step 10. Reconnect the COLD and HOT water supply hoses to their appropriate ports at the back of the machine.
Step 11. Turn your washing machine’s water taps back on, then plug the power cord back into the electrical outlet. To ensure that the issue has been fixed, try running a wash cycle.
Maytag Washing Machine Motor Hums — Solved
If your Maytag washing machine motor hums, it could indicate that the part is faulty. Before rushing to replace this part, you should test it. Here’s how to do this…
Drive Motor
To test your Maytag washing machine motor, follow the steps below…
Front Loaders
Take the following steps to test your front loader Maytag washing machine motor…
Step 1. Before starting this repair, it is advised that you disconnect your washing machine from the electrical outlet in order to prevent electrocution.
Step 2. Use a 1/4 inch nut-driver to loosen the bolts securing the rear access panel to the cabinet. Pry the panel off the washer and set it aside.
Step 3. Rotate the drive pulley slowly, then take the belt off. Unplug the wire harness from the motor assembly.
Step 4. Using a 13mm socket wrench, loosen the bolts securing the motor assembly to the bottom of the tub. Carefully lift the motor out of the cabinet.
Step 5. Get a multimeter, then turn the dial to the ohms setting. Place the probes of the multimeter in the two red terminals on the motor. For a working connection, you should get a reading of roughly 70 ohms.
Step 6. Insert the probes into the other motor terminals, then look for a reading between 2 and 7 ohms. If the readings are much higher or lower than these numbers, the motor will need to be replaced.
Step 7. If you’ve determined that the motor is in good condition, remount it at the bottom of the tub, then use your 13mm socket wrench to apply the bolts.
Step 8. Plug the wire connector back into the motor assembly. Loop the drive belt back around the motor pulley and drive pulley (ensure that the belt has the grooved side turned inwards).
Step 9. Remount the rear access panel on the cabinet. Secure the panel by applying the bolts using your 1/4 inch nut-driver. Plug your washing machine back into the electrical outlet.
Top Loaders
Follow the steps below to test the drive motor in your top loader Maytag washing machine…
Step 1. Make sure to turn off your washer’s water supply taps and unplug the power cord from the outlet before starting this procedure in order to prevent electrocution or water leaks.
Step 2. Go to the back of the cabinet, then use a pair of pliers to release the retaining clamp holding the drain hose to the machine. Disconnect the hose from the cabinet.
Step 3. Spread a towel on the floor underneath the water supply hoses to catch any leaks. With a pair of pliers, disconnect the water supply hoses from the ports at the back of your machine.
Step 4. Secure the lid of your washing machine using some tape. Carefully tip you’re appliance backwards and set it on the floor (if needed, get someone to help you).
Step 5. With a 5/16 inch nut-driver, loosen the bolts holding the belt guard to the bottom of the machine. Carefully take the drive belt off the motor pulley and transmission pulley.
Step 6. Disconnect the wire harness from the terminal on the motor assembly. Using your socket wrench, take out all the bolts holding the drive motor to the transmission plate. Carefully lift the motor off the plate.
Step 7. Get a multimeter and turn the dial to the ohms setting. Place the probes of the multimeter in the two red terminals on the motor. For a working connection, you should get a reading of around 70 ohms.
Step 8. Insert the probes of the multimeter into the remaining terminals, then look for a reading between 2 and 7 ohms. If the readings are much lower or higher than these numbers, you’ll need to replace the motor.
Step 9. If the readings came out all right, remount the motor on the transmission plate, then use your socket wrench to apply the bolts.
Step 10. Plug the wire harness into the terminal on the motor. With the grooved part facing inwards, loop the drive belt around the transmission pulley and motor pulley.
Step 11. Put the belt guard back on. Secure the guard using your 5/16 inch nut-driver. Carefully lift the machine back onto its feet, then peel the tape off the lid.
Step 12. Go to the back of the washer, then reattach the HOT and COLD water supply hose to their corresponding ports.
Step 13. Connect the main outlet hose to the port at the back of the machine, then use your pliers to slide the retaining clamp into place.
Step 14. Reconnect your appliance to the electrical outlet, then turn the water supply taps back on.
Dryers
To test the drive motor in your Maytag dryer, follow the steps below…
Step 1. Make sure to disconnect your appliance from the electrical outlet before starting this repair in order to prevent electrocution.
Step 2. Using a 1/4 inch nut-driver, loosen the bolts at the bottom of the front panel. Lift the off the cabinet. Unplug the door switch wires from the front panel (make sure to note where each wire goes).
Step 3. Unhook the door switch wires from the retainer on the front bulkhead. Using your nut-driver, take out the bolts holding the bulkhead to the front of the cabinet. Lift the bulkhead off and set it aside.
Step 4. Reach underneath the drum carefully, then push the idler pulley inwards to release the tension on the drive belt. Unhook the drive belt from the motor pulley and idler pulley.
Step 5. Carefully pull the drum and belt out of the cabinet, then set them aside. Using your nut-driver, loosen the bolts holding the blower cover to the cabinet. Take the cover off the assembly.
Step 6. Using needle-nosed pliers, take out the retaining clamp securing the blower wheel. Slide the blower wheel off the shaft and set it aside.
Step 7. Use your needle-nosed pliers to take the rear retaining ring off the shaft. Take note of the positioning of the connectors attached to the motor assembly, then disconnect each one.
Step 8. With a flat-blade screwdriver, pry the rear and front retaining clips off the motor assembly. Pull the drive motor out of the cabinet.
Step 9. Get a multimeter, then turn the dial to the ohms setting. Place the multimeter’s probes in the red terminals on the motor. A working motor should give a reading of about 70 ohms.
Step 10. Insert the probes into the remaining terminals, then look for a reading between 2 and 8 ohms. If the readings are much lower or higher than these numbers, you’ll need to replace the motor assembly.
Step 11. If the readings came out all right, reinstall the motor assembly in the cabinet. Secure the motor by snapping the two retaining clips on.
Step 12. Plug each wire connector into its appropriate terminal on the motor assembly. Use your needle-nosed pliers to snap the rear retaining ring onto the motor shaft.
Step 13. Place the blower wheel on the motor shaft, then secure it with the front retaining ring.
Step 14. Put the blower assembly cover back on, then use your nut-driver to apply the bolts.
Step 15. Lift the drum and belt, then guide them back into the cabinet. Reach under the drum, then loop the drive belt around the motor pulley and idler pulley in a zig-zag formation.
Step 16. Slowly rotate the drum by hand to ensure that the belt is properly aligned. Mount the front bulkhead on the cabinet. Secure the bulkhead by applying the bolts with your nut-driver.
Step 17. Secure the door switch wires in the retainer on the front bulkhead. Plug each of the door switch wires back into the front panel.
Step 18. Remount the front panel on the cabinet, then tighten the bolts at the bottom using a nut-driver. Plug your dryer back into the electrical outlet.
Motor Stator
Test the stator in your Maytag washing machines with the following steps…
Front Loaders
Follow the steps below to test the stator in your Maytag front loader washing machine…
Step 1. Disconnect your washing machine from the power outlet before starting this procedure in order to prevent electrocution.
Step 2. Loosen the screws holding the rear panel to the cabinet using a 1/4 inch socket wrench. Carefully lift the panel off the cabinet and set it aside.
Step 3. Secure the rotor assembly at the back of the tub using a strap wrench. Loosen the bolt securing the rotor using a 24mm socket wrench. Carefully pry the rotor off the tub and set it aside.
Step 4. With a 10mm socket, take out the bolts holding the stator assembly to the back of the tub. Lift the stator off the tub, then unplug the wire connector.
Step 5. Get a multimeter, then turn the dial to the ohms setting. Place the multimeter probes in each of the terminals on the stator. For a working stator, you should get a reading between 9 and 10 ohms.
Step 6. If the reading is much higher or lower than these numbers, the stator will need to be replaced.
Step 7. If you’ve determined that the stator is in good condition, remount it at the back of the tub, then apply the bolts using your socket wrench.
Step 8. Plug the wire harness into the stator. Place the rotor assembly over the stator, then use your 24mm socket wrench to tighten the bolt.
Step 9. Remount the rear access panel on the cabinet, then use the 1/4 inch nut-driver to apply the bolts. Plug your washing machine back into the electrical outlet.
Top Loaders
To test the motor stator in your top loader Maytag washing machine, follow the steps below…
Step 1. In order to prevent electrocution and water leakage, it is advised that you disconnect your washer from the outlet and turn the water taps off before taking any other steps.
Step 2. Disconnect the two water supply hoses from the ports at the back of the washing machine (we recommend keeping a rag nearby to clean up any leaks).
Step 3. Using pliers squeeze the retaining clamp holding the drain hose to the back of the cabinet, then slide it out of place. Disconnect the hose from the back of the machine.
Step 4. Secure the lid of your washing machine by putting some tape on it. With someone assisting you, tip your washing machine backwards and set it on the floor.
Step 5. Insert a small screwdriver into one of the holes on the rotor assembly. Loosen the bolt holding the rotor to the bottom of the tub using a 1/4 inch Allen wrench.
Step 6. Pry the rotor off the tub and set it aside. Using a 3/8 inch socket wrench, take out the bolts holding the stator to the bottom of the tub. Lift the stator off the tub.
Step 7. Unplug the wire harness attached to the stator. Get a multimeter, then turn the dial to the ohms setting.
Step 8. Place the probes of the multimeter in each of the stator’s terminals. For a working stator, you should get a reading of roughly 9 to 10 ohms.
Step 9. If the reading is much lower or higher, the stator is damaged and needs to be replaced.
Step 10. If the stator readings came out all right, remount it at the bottom of the tub, then tighten the bolts using your socket wrench.
Step 11. Plug the wire connector into the stator. Remount the rotor on the stator, then use the 1/4 inch Allen wrench to tighten the bolt.
Step 12. Carefully lift your washing machine back onto its feet, then peel the tape off the lid. Reconnect the main drain hose to the port at the back of the cabinet, then slide the retaining clamp into place to secure it.
Step 13. Reconnect the COLD and HOT water supply hoses to the ports at the back of the washer. Turn your washer’s water taps back on, then plug the power cord into the outlet.
How To Replace Maytag Washing Machine Motor Pulley — Quick Fix
To replace the motor pulley in your Maytag washer, follow the steps below…
Step 1. In order to prevent electrocution, it is advised that you disconnect your machine from the outlet before starting this repair.
Step 2. Using a 1/4 inch nut-driver, take out the bolts at the bottom of the front panel. Lift the panel off the cabinet.
Step 3. Note the positioning of the connectors attached to the door switch on the front panel, then disconnect each one. Set the front panel aside.
Step 4. Unhook the door switch wires from the retainer on the front bulkhead. With your nut-driver, take out the nuts securing the bulkhead to the front of the cabinet. Lift the bulkhead off the drum and set it aside.
Step 5. Reach underneath the drum carefully, then push the idler pulley inwards to release the tension on the drive belt. Take the drive belt off the motor pulley and idler pulley.
Step 6. Carefully pull the drum and drive belt out of the cabinet, then set them aside. With your nut-driver, loosen the bolts holding the blower cover to the machine. Take the cover off and set it aside.
Step 7. Using needle-nosed pliers, pull the front retaining ring off the blower wheel shaft. Take the blower wheel off the shaft and set it aside.
Step 8. Use your needle-nosed pliers to take the rear retaining ring off the shaft and set it aside.
Step 9. Unplug the wire connectors attached to the motor assembly (make sure to take note of where each plug goes).
Step 10. Pry off the two retaining clips holding the motor assembly to the base of the cabinet using a flat-blade screwdriver. Pull the motor out of the cabinet.
Step 11. Using a 1/4 inch Allen wrench, loosen the set screw holding the motor pulley (this will require some effort). Slide the pulley off the motor shaft and discard it.
Step 12. Take your new motor pulley out of its packaging. Slide the new pulley onto the shaft (the pulley should be 3/8ths of an inch away from the motor support).
Step 13. Lock the new pulley into place by tightening the set screw with your 1/4 inch Allen wrench.
Step 14. Lift the motor assembly and guide it back into the cabinet. Secure the motor by snapping the two retaining clips on.
Step 15. Plug each wire connector into its appropriate terminal on the motor. Use your needle-nosed pliers to place the inner retaining clamp on the motor shaft.
Step 16. Place the blower wheel on the shaft, then secure it by sliding the front retaining clamp onto the shaft.
Step 17. Put the blower cover back on the assembly. Secure the cover by applying the screws using your nut-driver.
Step 18. Carefully guide the drive belt and drum into the cabinet. Reach underneath the drum carefully, then loop the drive belt around the idler pulley and new motor pulley.
Step 19. Slowly rotate your dryer’s drum by hand to make sure that the drive belt is properly aligned.
Step 20. Mount the front bulkhead on the cabinet, then apply the bolts using your nut-driver. Push the door switch wires into the retainers on the bulkhead.
Step 21. Plug each of the door switch wires into the front panel. Remount the front panel on the cabinet, then secure it by tightening the screws at the bottom using your nut-driver. Plug your machine back into the outlet.
Note: Please keep in mind that the steps above will vary a bit depending on the model of your machine.
How To Replace Maytag Washing Machine Motor Coupler — Solved
To replace your Maytag washing machine motor coupler, follow the steps below…
Step 1. In order to prevent electrocution or water leakage, it is advised that you turn your washing machine’s water supply faucets off and disconnect the power cord from the outlet before starting this repair.
Step 2. Using a screwdriver, loosen the bolts at the back of the machine securing the control panel. Lift the panel out of place, then let it hang over the rear panel.
Step 3. Unplug the lid switch connector from the top panel. Using a flat-blade screwdriver, pry out the retaining clips holding the cabinet to the rear panel.
Step 4. Open the lid of your washer. Carefully lift the cabinet off the machine and set it aside. Using a flat-blade screwdriver, pry off the two retaining clips holding the drain pump assembly to the motor shaft.
Step 5. Slide the pump off the motor shaft. Unplug the wire harness from the motor assembly. Loosen the upper and lower retaining clamps securing the motor by taking out the bolts with your 1/4 inch nut-driver.
Step 6. Carefully lift the motor assembly off. Using the end of a hammer, pry the coupler cog and isolator off the motor shaft. Pull the second coupler cog off the motor mount on the machine.
Step 7. Discard the old coupler pieces, then take the new assembly out of its packaging. Push one of the new coupler cogs onto the motor mount as far as it can go.
Step 8. Place the second coupler cog on the motor shaft, then push the rubber isolator piece on.
Step 9. Lift the motor assembly and place it on the mount. Snap the upper and lower retaining clips onto the motor, then use a 1/4 inch nut-driver to apply the bolts.
Step 10. Plug the wire harness into the motor assembly. Place the drain pump assembly on the motor shaft, then snap the upper and lower retaining clips on.
Step 11. Lift the cabinet and carefully lower it onto the machine. Using a flat-blade screwdriver, push the two retaining clips back into the slots on the top panel.
Step 12. Plug the lid switch wire connector back into the top panel. Lower the top panel and snap it on the cabinet. Tighten the bolts at the back of the panel using your screwdriver.
Step 13. Plug your washing machine back into the electrical outlet, then turn the water supply taps back on. To ensure that everything works properly, try running a cycle.