If your Electrolux washing machine buttons are giving you issues, you’ve come to the right place. This easy-to-follow guide gives you steps on how to handle the situation. So, without further ado, let’s get right to it…
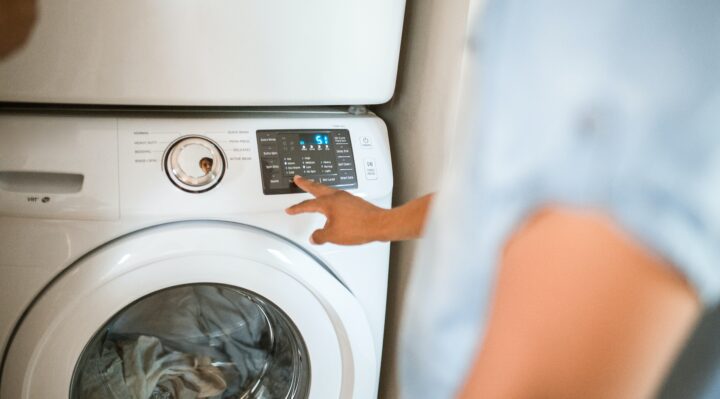
Table of Contents
Electrolux Washing Machine Start Button Not Working — How To Fix
If your Electrolux washing machine button isn’t working, the first thing you should do is check to ensure that the door is properly locked. As a safety precaution, most front loader washing machine’s will not start a cycle unless the door is properly locked.
If your Electrolux washing machine door isn’t locking, it means the lock assembly is damaged and needs to be replaced. Read this guide to learn how to do this.
Electrolux Washing Machine Buttons Not Working — Solved
If your Electrolux washing machine buttons aren’t working, try unplugging the machine from the outlet then plugging it back in after a few minutes. If the buttons still don’t work, the interface control board may be damaged. Here’s how to replace these parts…
How To Replace Electrolux Washing Machine UI Control Board
Replace your washing machine’s interface control board with the following steps…
Step 1. Prevent any chance of electrocution by disconnecting your appliance from the outlet before starting this repair.
Step 2. Go to the back of your washing machine, then loosen the bolts holding the top panel to the machine. Pull the cover off the cabinet and set it aside.
Step 3. Get someone to help you tip the washing machine backwards. Use a Philips screwdriver to loosen the four bolts at the bottom of the front panel.
Step 4. Set your washing machine back onto its feet, then open the door. Wedge a flat-blade screwdriver underneath the retaining wire around the gasket, then pry it out (take care not to puncture the gasket).
Step 5. Peel the door boot seal off the door opening. Slide the soap tray out of the dispenser assembly, the remove the two screws next to the dispenser.
Step 6. Remove the four bolts at the top of the front panel using your Philips screwdriver. Pry the panel off the front of the cabinet. Unplug the two wire harnesses attached to the panel.
Step 7. Set the front panel face-down on the floor. Use a small flat-blade screwdriver to unplug the ribbon UI board ribbon connector.
Step 8. With your Philips screwdriver, remove the nuts holding the board to the control panel.
Step 9. Take the UI control board off the panel, then discard it. Remove your new control boar from its packaging.
Step 10. Mount the new control board on the cabinet, then secure it by applying the screws. Plug the ribbon wire connector back in.
Step 11. Carefully lift the front panel assembly, then plug the two wire harnesses back in. Mount the front panel on the cabinet, then use your Philips screwdriver to apply the screws at the top.
Step 12. Carefully tip your washing machine backwards, then use your screwdriver to apply the four bolts at the bottom.
Step 13. Set your washing machine back onto its feet, then apply the two screws beside the dispenser assembly. Slide the soap tray into the dispenser.
Step 14. Open your machine’s door, then refit the gasket around the opening. Use your screwdriver to fit the metal band around the door gasket.
Step 15. Mount the top panel on the cabinet, then use your Philips screwdriver to apply the screws at the back. Plug your machine back into the electrical outlet, then try running a wash cycle
Check out these other articles…
How To Clean Electrolux Washing Machine [Detailed Guide]
Electrolux Washing Machine Dispenser [Issues & Solutions]
Electrolux Washing Machine Smells [Easy Solutions]
Electrolux Washing Machine Stuck [Proven Solutions]
Electrolux Washing Machine Not Spinning [Proven Solutions]
How To Replace Electrolux Washing Machine Control Knob And Board Assembly
Follow the steps below to replace the control knob and board assembly in your Electrolux washing machine…
Step 1. Before starting this procedure, make sure to unplug your washing machine from the power outlet in order to prevent electrocution.
Step 2. With someone else assisting you, carefully move your washing machine forwards a bit to get more working space.
Step 3. Open your washer’s door, then take the retaining wire off the door boot seal using a flat-blade screwdriver or a pair of needle-nosed pliers. Peel the gasket off the front panel.
Step 4. Tip your washing machine backwards a bit, then have your assistant help you support the machine. Use a screwdriver to take out the four nuts at the bottom of the panel.
Step 5. Set your washing machine back on its feet. Slide the detergent tray out of the housing, then release it by pressing the button inside. Set the tray aside.
Step 6. Using a Philips screwdriver, remove the screws at the back of the machine holding the top panel. Pull the top cover backwards about a few inches, then lift it off the machine.
Step 7. Use your screwdriver to remove the two screws next to the dispenser opening. Loosen the four screws at the top of the front panel.
Step 8. Carefully lift the entire front panel off the cabinet. Unplug the two wire harnesses from the front panel. Set the front panel face-down on the floor.
Step 9. Using a small screwdriver, unplug the ribbon connector from the control knob board. Use your Philips screwdriver to remove the screws holding the board to the panel.
Step 10. Take the board off the panel, then discard it. Remove your new washing machine control knob and board assembly from its packaging.
Step 11. Mount the new board on the panel, then secure it by applying the screws with your Philips screwdriver.
Step 12. Plug the ribbon connector into the new control knob board. Lift the front panel assembly, then plug the two wire harnesses back in.
Step 13. Snap the control panel onto the front of the machine, then apply the screws at the top to secure it.
Step 14. Tip your washing machine backwards carefully, then place a support under the front panel. Use a Philips screwdriver to apply the four screws at the bottom of the panel.
Step 15. Take the support out from under your washing machine, then set the appliance back onto its feet.
Step 16. Use your screwdriver to apply the two screws next to the dispenser assembly. Slide the detergent tray back into the dispenser.
Step 17. Open your washer’s door, then refit the gasket around the front panel. Use a flat-blade screwdriver to fit the retaining wire around the door gasket.
Step 18. Place the top panel on the cabinet, then secure it by applying the screws at the back using your Philips screwdriver.
Step 19. Plug your washing machine back into its electrical outlet, then try turning your machine on to make sure the issue has been fixed.