If your Maytag washing machine timer is giving you issues, you’ve come to the right place. This guide gives you steps on how to deal with them…
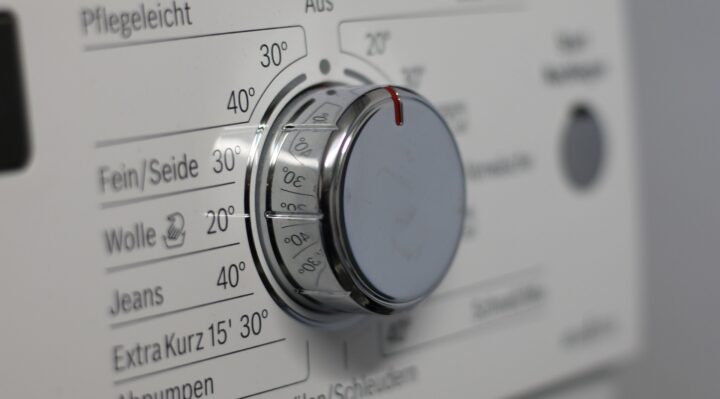
Table of Contents
How To Test Maytag Washing Machine Timer — Solved
To test your Maytag washing machine timer, follow the steps below…
Top Loaders
Take the following steps to test your top loader Maytag washing machine timer…
Step 1. In order to prevent any chances of electrocution, disconnect your washing machine from the outlet.
Step 2. Go to the back of the machine, then take out the screws holding the control panel in place using a Torx screwdriver. Set the control panel face-down on the cabinet.
Step 3. Pry the wire harness off the timer (use a flat-blade screwdriver if needed). Get a digital multimeter.
Step 4. Turn the timer knob to any setting except the ‘Off’ position. Turn your multimeter’s dial to Continuity Test Mode.
Step 5. Place the probes of the meter on the timer’s terminals, then check them for continuity (there should be a diagram on your washer’s cabinet giving you the numbers to look for).
Step 6. If you get an OL on your multimeter’s display, it indicates that the timer is defective and needs to be replaced.
Step 7. Once you’ve determined that the timer is in good condition, reset the knob to the ‘Off’ position. Plug the wire harness back into the timer.
Step 8. Lift the control panel assembly and snap it back onto the cabinet. Secure the panel by applying the Torx screws. Plug your washing machine back into the outlet.
Dryers
To test the timer assembly in your Maytag dryer, follow the steps below…
Step 1. Disconnect your washing machine from the power outlet before starting this procedure in order to prevent any chances of electrocution.
Step 2. Take out the bolts holding the control panel to the cabinet using a Torx screwdriver. Set the panel face-down on the cabinet.
Step 3. Disconnect the wire harness attached to the timer assembly. Lift the control panel, then rotate the timer knob to any position other than ‘Off’.
Step 4. Get a digital multimeter, then rotate the dial to Continuity Test Mode. Place the probes of the meter on the timer’s terminals, then check for continuity (there should be a diagram on your washer showing you what numbers to look for).
Step 5. If you get an ‘OL’ on the multimeter’s display, the timer is damaged and needs to be replaced.
Step 6. If you’ve determined that the timer is in good condition, plug the wire harness back in. Reset the timer knob to the ‘Off’ position.
Step 7. Lift the control panel assembly and snap it back into place. Secure the panel by applying the bolts at the back using your Torx screwdriver. Reconnect the dryer to the outlet.
Check out these other articles…
Maytag Washing Machine Will Not Start [How To Fix]
Kenmore Washing Machine Heating [Issues & Solutions]
Kenmore Washing Machine Error Codes [How To Fix]
Kenmore Washing Machine Is Making Noise [How To Fix]
Samsung Washing Machine Is Not Heating [3 Causes & Solutions]
Samsung Washing Machine Is Overheating [3 Causes & Solutions]
How To Replace Maytag Washing Machine Timer — Quick Fix
To replace your Maytag washing machine timer assembly, follow the steps below…
Dryers
Do the following to replace the timer assembly in your Maytag dryer…
Step 1. Prevent any chances of electrocution by disconnecting your appliance from the outlet before starting this repair.
Step 2. Using a Torx screwdriver or a 1/4 inch nut-driver, take out the bolts at the back of the machine securing the control panel. Lift the control panel out of place and set it face-down on the cabinet
Step 3. Note the positioning of the wires attached to the timer, then disconnect them.
Step 4. Loosen the bolts holding the timer to the control panel using a 1/4 inch nut-driver. Lift the control panel, then take the timer knob off the shaft.
Step 5. Take the timer assembly off the control panel, then discard it. Prepare the new timer assembly for installation by taking it out of its packaging.
Step 6. Mount the new timer on the control panel, then secure it by applying the 1/4 inch bolts. Plug each connector into its appropriate terminal on the new timer.
Step 7. Lift the control panel and snap the timer knob onto the shaft. Snap the control panel assembly onto the cabinet, then apply the screws at the back using your Torx screwdriver.
Step 8. Plug your washing machine back into the outlet, then try running a cycle to make sure everything works properly.
Top Loaders
To replace your top loader Maytag washing machine timer assembly, follow the steps below…
Step 1. In order to prevent any chances of electrocution, it is advised that you disconnect your washing machine from the outlet before starting this repair.
Step 2. Take out the bolts at the back of the machine holding the control panel using a Torx-20 screwdriver. Lift the panel out of place, then set it face-down on the cabinet.
Step 3. Disconnect the wire harness attached to the timer assembly. Take out the bolt holding the timer to the control panel using a 1/4 inch nut-driver.
Step 4. Use a small flat-blade screwdriver to pry the locking pin out of the opening at the back of the timer.
Step 5. Lift the control panel, then pull the timer knob off the shaft. Pry the timer assembly off the control panel, then discard it.
Step 6. Prepare the new timer assembly for installation by taking it out of its packaging. Mount the new timer on the control panel.
Step 7. Secure the new timer by applying the bolt with your nut-driver. Plug the wire harness into the new timer.
Step 8. Place the timer knob on the shaft. Secure the knob by pushing the locking pin into place at the back of the timer.
Step 9. Snap the control panel assembly back onto the cabinet, then secure it by applying the bolts at the back using a 1/4 inch nut-driver or a Torx-20 screwdriver.
Step 10. Plug your washing machine back into the electrical outlet. To ensure that everything works properly, test your machine by running a wash cycle.